
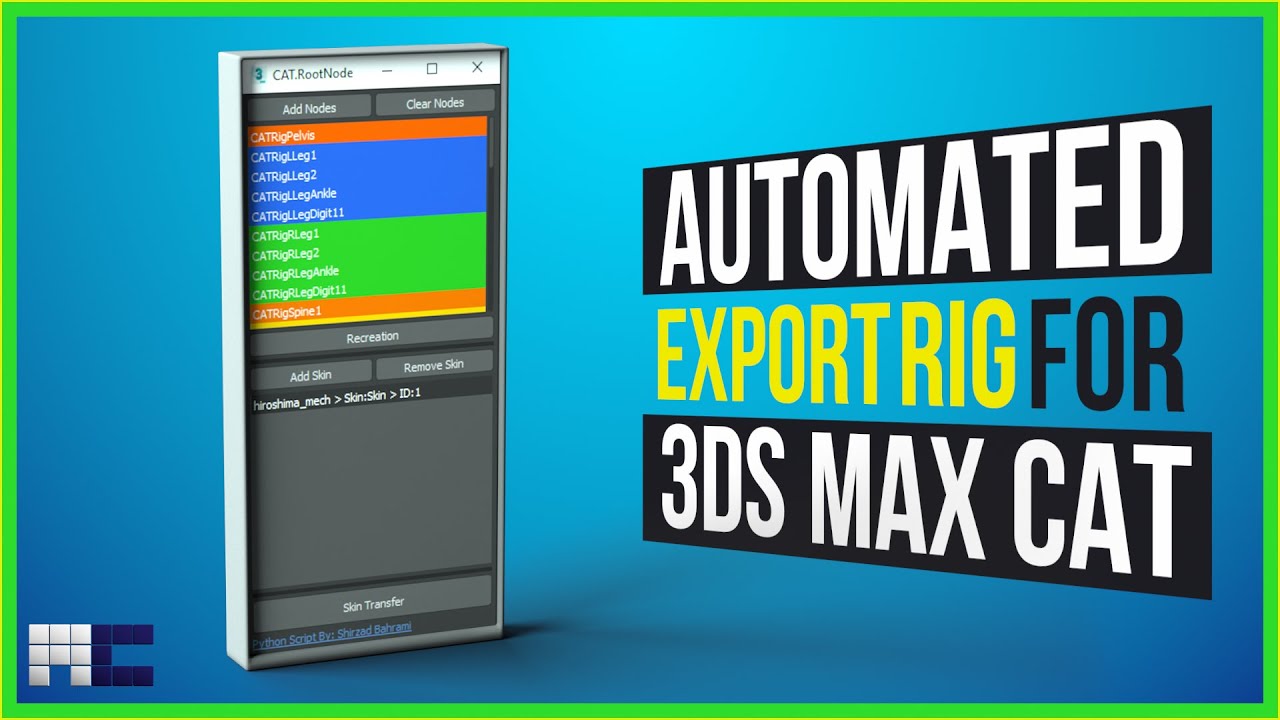
CAT.RootNode – Skin And Rig Transfer For Game Engine
3 November 2021
How To Use:

1. Run CAT.RootNode:
- Run CAT.RootNode by pressing the X button and search CAT.RootNode
- Also, you can assign a shortcut to it using Hotkey Editor
2. Selecting the CAT bones:
- Select All the CAT bones, try not to add the wrong type of nodes like IK, Handles, …etc
- Also script filters the nodes and just let the “CAT one / Hub Object” class go through

3. Adding the CAT nodes:
- Press the Add Nodes button to add CAT bones to the node list
- You can remove the bones by pressing the Clear Nodes
4. Recreating the rig structure:
- By pressing the Recreation button, create new bones with a root bone
- New nodes have the same Name, Color and Position
- Also the position and rotation of the new nodes are constrained to the CAT bones

5. Select the Model with Skin Modifier:
- Now Select the mesh and in the modify panel select the skin modifier and press the Add Skin
6. Adding more Models:
- If your character has more than one object with skins repeat the process and add all of them to the list
- If you have selected the wrong model you are able to select it in the list and remove selected from the Skin List
- By selecting the object in the Skin List 3Ds Max will select them

7. Transfer the skin data:
- Press the Skin Transfer button to transfer the skin data from the old modifier to a new one named “Transferred Skin”
- Note that your old Skin modifier is still there but it’s disabled
8. Enjoy!
- Now each of your models has a new “Transferred Skin” and they are attached to the new nodes instead of CAT bones.
- Easy installation: Run “One-Click Installation.bat”.installation: Unzip the “CATRootNode.zip” inside “C://ProgramData//Autodesk//ApplicationPlugins”.How To Run: Now, it’s a MacroScript, which you can assign a shortcut to it or search it using “X” in 3Ds Max.
Supported Version
2020 - 2021 - 2022Download
Posted in Tools